These are before the Remodel:
Are you sufficiently horrified yet? Seriously looking at these pictures makes me want to run away from home. It was so bad. I lived like this for nearly 4 years! UGH *shudder*. The only thing the kitchen had going for it was the cute curve in the cabinetry above the sink. I didn't get a very good picture of it before the Husb tore out the cabinets, but you can kind of see it in this picture.
I know that one hole sinks are all the rage these days, but I am telling you; NEVER again. It was one of the worst experiences of my life, trying to do the dishes in that sink with no dishwasher. I had to keep the water running the whole time in order to rinse the dishes and then if I came upon something that was full of liquid (such as a sippy cup full of old juice), I had no where to dump it, as the sink was taken. Seriously, it sucked. Big time. Also, the lady that had built the kitchen must have been under 5ft because the counter tops were so low. I am quite short at my 5'3", but it hurt my back to work at those counter tops. It is a wonder I ever made dinner or cookies at all.
Now on to the good part. The "After" pictures. That is why you are all here, right? Well, here we go. First off, I will tell you where I got the cabinets and the experience that I had there. One day the Husb and I were playing around on the IKEA website designing our dream kitchen. When we finished, we realized that this may actually be attainable. It was a great feeling, I can assure you. So, we had to make a trip "Up North" as we refer to it. We live 3 hours away from the nearest IKEA (how do I survive?). Lucky for us, we were going up there anyway to see some family and take the kids to the Zoo.
We went to IKEA and beelined for the Kitchen department. The very unfriendly staff pulled up our design on the computer and began telling me how my design was "a little tight". Seriously? I was going to cram all of the cabinet and counter top space in there I could! If she had any idea what I was currently living with, she may have been smart enough to keep her mouth shut. Well, I quickly assured her that the design was fine and to proceed (did she want to make a sale here or not?). Well, she then asked me what style of cabinets I wanted. Of Course the ones that I loved were going out of stock, which she repeatedly told me as she tried to talk me out of them. When I finally had her convinced that it was what I wanted, we added them to the order. After some more picking of different necessary items (drawer pulls and the like) we were ready to go. Except for the counter top. I just couldn't find one that I loved enough to shell out the cash for. This is a different tale that I will come back to after I show you some pictures.
Because none of the walls in our house are square and because they are all 15 inch adobe brick, the Husb had to do some framing to make the project a little easier in the long run. My little brother came over and helped (he is the one with the awesome white man afro). I also added some pictures of our smallest helper. How cute is he?
Next up came the building of the cabinets. If you have ever bought anything from IKEA, you know that it all comes in flat boxes and you put it together when you get it home. Great idea when you are at the store and need to get it home, not so great when you are putting a whole kitchen together. It took us ALL day to assemble them. I am sure that our little helpers didn't prolong the process at all.
Next up came the Counter tops. I am probably the cheapest person on the planet and I just couldn't bring myself to pay over $1000 for Counter tops. So, we made some. The Husb cut them out of plywood (do you think we are crazy yet?).
We found this product called Giani Granite Countertop Paint.
The website said you could paint over your existing countertop or even over plywood, so we thought; why not? Let's try it.
The first step was to Prime the wood. We used a wood primer first and then the primer that came with the kit.
Then we followed the steps and created our "Granite" Countertop
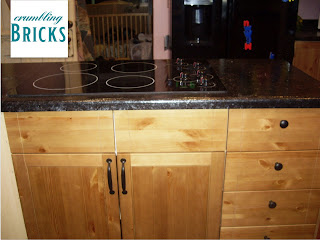
Doesn't it look great? The picture doesn't really do it justice, but it still looks pretty good. Here are some pictures of the finished kitchen along with a side by side comparison of the old and the new. I love being in the kitchen now. It is amazing what a little remodel will do.


Painting brick wall is really a tough task and it is time consuming as well. So you can make it as easy as possible by changing methods of painting. The blog is really impressive and i have learned lot of things about brick painting.
ReplyDeleteExterior wall coatings